After construction work, what should be a moment of satisfaction often turns into an unexpected problem. The floor is covered in fine dust, cement residue, stubborn stains, and ingrained dirt that won’t come off with conventional cleaning. Cleaning floors and tiles is often more complicated than it seems.
In our experience, many people underestimate this final phase, failing to consider that improper cleaning can damage new materials or leave residues that affect the outcome of the renovation. Therefore, approaching this process correctly is key. Based on our years of experience as a post-construction cleaning company, we will explain how to proceed step by step, which products to use, and what mistakes to avoid.
Why is it difficult to clean up after construction work?
Once the work is finished, the surfaces are exposed to a complex mixture of residues that cannot be removed with conventional cleaning. Each material used in the construction leaves different residues, many of them adhered or embedded, which complicates the process and requires a more technical and careful approach.
Remnants of cement, plaster, and materials
During a renovation, it’s common to find traces of cement, plaster, mortar, or adhesives on the floor and tiles. These materials dry quickly and adhere strongly, forming a layer that’s difficult to remove without using the right products.
Attempting to remove them without proper knowledge can cause scratches or damage to delicate surfaces such as porcelain or glazed tiles. Therefore, it is important to identify the type of residue before taking action and apply the correct treatment.
Fine dust and ingrained dirt
Construction dust is one of the biggest problems in this type of cleaning. It consists of very fine particles that get into joints, pores, and small irregularities on surfaces, making the floor always look dirty even after it has been cleaned several times.
If water is used without first removing this dust, it creates a layer of dirt that is more difficult to remove. This is one of the most common mistakes we see in poorly executed post-construction cleanings.
Accumulation of heavy remains and hidden debris
After construction work, it’s not all dust. Heavier debris such as material fragments, small pieces of rubble, or hidden residue in corners, joints, or other hard-to-reach areas can also remain. These elements make cleaning more difficult and can easily go unnoticed without a thorough inspection.
The presence of these residues can interfere with the use of the space, generate noise when stepped on, or even cause damage to the pavement if they are dragged during cleaning.
Need for professional tools and products
This type of cleaning cannot be done with basic household tools. In many cases, it’s necessary to use industrial vacuum cleaners, specific descaling agents, and machinery that allows for deep cleaning without damaging surfaces.
Using unsuitable products or ineffective tools can unnecessarily prolong the work and lead to an undesirable result. Therefore, having the right equipment makes a significant difference in these types of interventions.
Risk of damaging new finishes
Newly installed surfaces are often more sensitive to harsh products or improper cleaning techniques. A mistake at this stage can lead to permanent stains, loss of shine, or even material deterioration.
In our experience, this is one of the most significant risks. Improper cleaning can ruin the entire project, especially with materials like porcelain, stoneware, or delicate wall coverings.
Hazards of cuts and accidents with sharp waste
Often, construction work leaves behind debris that can be dangerous, such as small fragments of glass, nails, screws, or metal pieces . These items can cause cuts or accidents if they are not identified and properly removed before cleaning begins.
Therefore, it is essential to conduct a preliminary inspection and work with appropriate safety measures. Professional cleaning takes these risks into account and operates in a controlled manner to prevent any incidents during the process.
Preparation before cleaning the floor and tiles
Before starting to clean, it’s essential to properly prepare the area. Good preparation makes the entire subsequent process easier, prevents common mistakes, and allows you to work more efficiently and safely. Skipping this step often leads to the dirt spreading or a less than ideal final result.
Removal of rubble and bulky objects
The first step is to remove any visible construction debris, such as pieces of material, plastic, cardboard, forgotten tools, or large pieces of waste. These items obstruct access to surfaces and can interfere with cleaning if not removed beforehand.
Furthermore, moving and removing these objects allows you to discover hidden areas where dirt tends to accumulate. In many cases, we find debris behind doors, in corners, or under fixed elements, so it’s important to thoroughly inspect the entire space before proceeding.
Vacuuming of fine dust
Once the area is clear, the next step is to remove the fine dust that remains on all surfaces. This type of dirt is very light and disperses easily, so sweeping is usually not enough. It’s best to use a vacuum cleaner, preferably an industrial one, that can collect the dust without stirring it up.
Properly removing this dust is key, as mixing it with water creates a layer of dirt that’s harder to clean. In our experience, this step is one of the most important and, at the same time, one of the most undervalued in post-construction cleaning.
Why not just use water directly at the beginning?
It might seem logical to start cleaning with water, but doing so without first removing the dust is a very common mistake. When the surface is wet, the fine dust turns into a kind of paste that adheres even more to the floor and tiles, making it harder to remove.
That’s why we always recommend a thorough dry cleaning first. Only when most of the dirt has been removed is it appropriate to introduce water and cleaning products. This order of work allows for a much more effective result and avoids repeating the process multiple times.
How to clean the floor after construction, step by step
Once the coarsest dirt has been removed and the fine dust eliminated, it’s time to work directly on the floor. At this stage, it’s important to follow a logical order; it’s not about mopping repeatedly, but about applying each step at the right time.
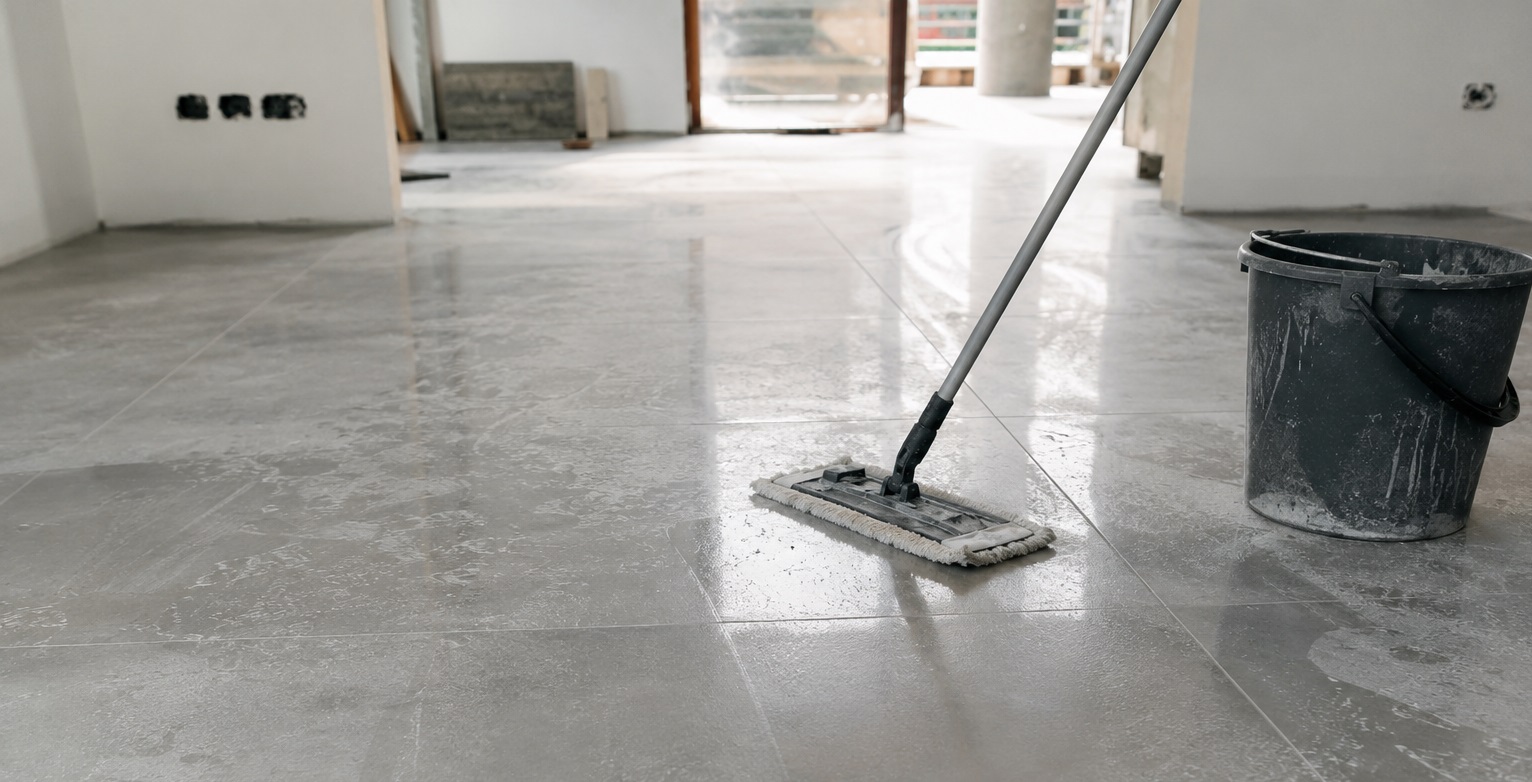
Step 1 – First dry cleaning
The first step should always be a dry cleaning to remove as much dust, sand, and fine debris as possible. Ideally, use a professional vacuum cleaner with good filtration capacity, as a regular broom can stir up the dust and redistribute it throughout the room.
This task should be carried out carefully, paying attention to corners, baseboards, joints, and areas near doors or windows. The better the dry dirt is removed at this stage, the more effective the subsequent wet cleaning will be.
Step 2 – Cleaning with water and appropriate products
Once the floor is free of loose dust, you can begin cleaning with water and products compatible with the material. Not all flooring types are suitable for the same cleaners, so it’s important to identify whether it’s ceramic tile, porcelain, laminate, natural stone, or another type of finish.
On durable floors, you can use lukewarm water with a specific post-construction cleaner or a neutral detergent if the dirt is not heavily ingrained. On delicate surfaces, it is best to avoid acidic or abrasive products and always test them first on an inconspicuous area.
Step 3 – Removing tough stains and material residue
Some construction debris won’t disappear with a basic scrubbing. Stains from cement, paint, adhesive, or dried plaster may require targeted treatment before proceeding with general cleaning. In these cases, it’s best to work carefully and avoid scraping with metal tools.
The best approach is to soften the stain with the appropriate product, let it sit for the recommended time, and then gently remove it with a plastic spatula or a non-scratch sponge. This process prevents damage to the flooring and allows for a safer restoration of the original finish.
Step 4 – Application of the descaling product
On floors with traces of cement, lime, or a whitish film, it may be necessary to apply a specific descaling agent. This type of product helps dissolve mineral residues that remain after construction and cannot be removed with conventional cleaners.
It should always be used following the manufacturer’s instructions and respecting the contact times. It is also important to check that the product is compatible with the type of flooring, especially natural stone, marble, or acid-sensitive surfaces.
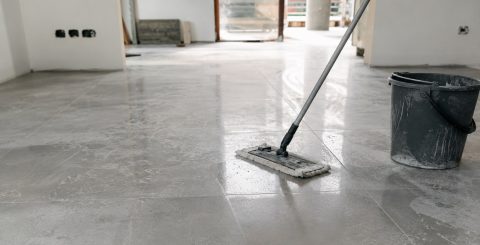
Step 5 – Thorough scrubbing and systematic rinsing
After applying the appropriate products, a thorough scrubbing is necessary to remove the loosened dirt. This step should be done with clean water, changing it frequently, as reusing dirty water only redistributes the residue on the pavement.
Rinsing is a key step. If any product residue remains on the floor, it can cause marks, streaks, or a sticky feeling when drying. Therefore, we recommend rinsing several times until the water runs clear and the surface is free of residue.
Step 6 – Drying, ventilation and final inspection
Finally, the floor must be thoroughly dried and the room well ventilated. Proper drying prevents watermarks, unpleasant odors, and moisture buildup in joints or corners. In some cases, using a dry mop or ventilation systems can help speed up the process.
Once dry, it’s advisable to inspect the pavement in good light to detect any residue, stains, or opaque areas. This final inspection allows you to correct minor imperfections and ensure the finished result meets expectations.
Tips for cleaning tiles after construction
Tiles often accumulate dust, cement, grout, adhesives, and splashes during a renovation. In our experience, the best results are achieved by combining patience, dry cleaning, appropriate products, and frequent rinsing.
Know the type of tile before you act
Each tile responds differently to cleaning. Glazed, porcelain, matte, or textured tiles don’t always accept the same products or the same scrubbing intensity. Therefore, before starting, we recommend identifying the finish and checking if the manufacturer provides any specific recommendations.
This step prevents mistakes such as applying acidic products to sensitive surfaces or using overly abrasive scouring pads on glossy tiles. When in doubt, it’s best to test first on an inconspicuous area and observe how the material reacts.
Always dry clean first
Before using water, it’s important to remove dust and loose debris with a mop, dry cloth, or vacuum cleaner with the appropriate attachment. If the surface is wetted directly, the fine dust will turn into a pasty film that spreads across the entire tile, making cleaning much more difficult.
This initial dry pass allows for greater precision and prevents residue from scratching the surface during scrubbing. In post-construction cleaning, this step can make the difference between a quick clean and a much longer process.
Combat the veil of cement
After tiling, it’s common for a whitish film to appear, caused by residue from cement, grout, or grout. This residue can make the surface look dull even when clean, especially on dark tiles or matte finishes.
To remove it, you should use specific products for removing construction debris, always compatible with the type of tile. It is important to apply them following the instructions, leave them on for the correct amount of time, and rinse several times with clean water to avoid marks or chemical residue.
Tools that clean without scratching
Choosing the right tools is just as important as the cleaning product. For tiles, we generally recommend microfiber cloths, soft sponges, clean mops, and plastic bristle brushes for dirtier areas. These tools allow you to remove debris without scratching the surface.
It’s best to avoid using metal scouring pads, hard scrapers, or any tool that could damage the finish. On new tiles, even a small scratch can be very visible, especially in direct natural or artificial light.
Special attention to the meetings
The joints accumulate a large portion of construction debris because they have a more porous and irregular surface. Cement, dust, and grout residue can become trapped in them, giving a dirty appearance even if the tile itself is clean.
To treat them, it’s advisable to use a small brush with soft or medium bristles and suitable products that won’t damage the grout. It’s also important not to apply too much force, as a freshly laid joint can be damaged if handled aggressively.
Clean water is your best ally
In post-construction cleaning, changing the water frequently is essential. If you continue cleaning with dirty water, cement residue and dust will redeposit on the tiles, leaving marks and streaks when they dry.
Ideally, rinse several times and use clean cloths or mops each time. This detail, although it seems simple, helps achieve a much more uniform finish and avoids having to repeat the entire cleaning process the next day.
Products for cleaning floors after a renovation
Each type of flooring has different characteristics, so the same cleaner isn’t always suitable for stoneware, porcelain, laminate, natural stone, or tiles. In our experience, the most common mistake is using overly aggressive products or improvised solutions without first checking their compatibility with the material.
Descaling agents and specific cleaners
These products are designed to remove mineral residues such as cement, lime, mortar, or grout. They are especially useful when a whitish film appears on the floor or when residue remains after construction. Their function is to dissolve these residues to facilitate their removal without the need for excessive scrubbing.
However, not all descaling agents are suitable for all materials. On porcelain or stoneware floors, they usually work well if applied correctly, but on marble, natural stone, or sensitive surfaces, they can cause stains or loss of shine. Therefore, we always recommend reading the product information sheet, respecting the contact time, and testing it first on an inconspicuous area.
Natural solutions and homemade alternatives
For light cleaning, some homemade solutions can help remove dust, surface marks, or small stains.
- Warm water with neutral soap is usually a safe option for a gentle first cleaning, especially when there is no cement residue left on.
- Diluted vinegar can also be used in very specific cases, provided the pavement allows it.
Even so, these alternatives have their limitations. When there are dried construction debris, encrusted cement, or stubborn stains, home remedies often fall short and may require repeating the job several times. In these cases, the wisest course of action is to use specialized products or professional cleaning to avoid further damage.
Products to avoid
Some products may seem effective at first, but end up damaging the floor or tiles.
- Special care should be taken with strong acids, concentrated bleach, undiluted ammonia, solvents, hydrochloric acid, or abrasive cleaners, especially on delicate or newly installed surfaces.
- We must also avoid uncontrolled homemade mixtures, as they can generate dangerous fumes or unwanted chemical reactions.
In post-construction cleaning, the goal isn’t to use the strongest product, but rather the most suitable one for each material and type of residue. This distinction is key to achieving a good result without compromising the new finishes.
Common mistakes when cleaning after construction
They can greatly complicate the work and affect the final finish of floors and tiles. Avoiding these mistakes is just as important as choosing good products.
Not analyzing the soil type
Each type of flooring requires specific treatment. Porcelain tile, laminate, ceramic tile, marble, or natural stone floors are not cleaned the same way. Applying the same product to all materials can cause stains, loss of shine, or surface damage.
Before starting, it’s advisable to identify the type of flooring and check which products it’s compatible with. This preliminary step prevents costly mistakes and allows you to work more safely, especially when dealing with new or delicate materials.
Using too much water at the beginning
Starting with a lot of water often makes cleaning worse. When fine construction dust mixes with water, it becomes a paste that spreads across the floor and gets into joints, corners, and pores of the material.
That’s why we always recommend removing dirt while it’s dry first. Only then does it make sense to use water and specific cleaning products. Following this order reduces the number of passes and prevents streaks from appearing when drying.
Inadequate products
Using overly harsh products is another common mistake. Strong acids, bleach, ammonia, solvents, or abrasive cleaners can damage new finishes, especially on delicate floors or glossy tiles.
The best approach is to choose products compatible with each surface and the type of residue you want to remove. If in doubt, it’s best to test the product on an inconspicuous area first before applying it to the entire room.
Rub without removing the previous dust
Using a mop, sponge, or brush on a dusty surface can have the opposite effect. Instead of cleaning, it spreads particles that can scratch the floor or leave a grayish layer that’s difficult to remove.
Dry cleaning beforehand is essential to avoid this problem. Vacuuming properly before mopping allows the cleaning products to work better and results in a cleaner, more uniform, and longer-lasting finish.
When is the best time to hire a professional cleaning service after construction work?
There are situations where having specialists on board makes a clear difference in the outcome. Identifying when it’s worthwhile to take this step allows you to avoid mistakes, save time, and ensure a final result that matches the investment made in the project.
Volume and gravity of waste
When a construction project has been large-scale, the amount of accumulated waste is usually considerable. Cement residue, ingrained dust, stubborn stains, or hazy surfaces require more technical and organized cleaning.
In these cases, home methods often fall short and require repeating the job several times. Professional intervention allows for a faster and more effective approach to tackling the volume of dirt, using appropriate machinery and products.
Time and habitability factors
After a renovation, there’s often a need to use the space as soon as possible. Whether it’s a home, a business, or an office, the time available for cleaning is usually limited, and the priority is to get everything ready in the shortest possible time.
Having a professional team allows you to significantly reduce the time required and ensures that the space is habitable from day one. This is especially important for businesses or rental properties, where every day of disuse represents a loss.
Complexity and value of materials
In projects where high-value materials have been installed, such as large-format porcelain tiles, delicate flooring, or special coatings, the risk of damaging the finishes during cleaning is greater.
Professional cleaning takes into account the type of material and applies specific techniques for each surface. This prevents problems such as loss of shine, permanent stains, or premature deterioration, ensuring that the final result lives up to the quality of the work done.
Health, safety and guarantees
Post-construction cleanup involves more than just visible dirt. It can also include airborne particles, chemical residues, and hazardous materials such as broken glass or sharp objects. All of these can pose a risk if not handled properly.
In our case, we work with safety protocols, protective equipment, and insurance that guarantee a safe intervention. The client has the peace of mind of knowing they have a professional service that responds to any incident.
Need for additional services
Often, post-construction cleaning isn’t limited to floors or tiles. It’s common to also need to clean windows, frames, blinds, light fixtures, or hard-to-reach areas that have accumulated dust and debris during the renovation.
This is where integrating complementary services like window cleaning in Mallorca makes sense, allowing you to leave the space completely ready for use. A comprehensive approach avoids having to coordinate multiple providers and guarantees a consistent result throughout the property.
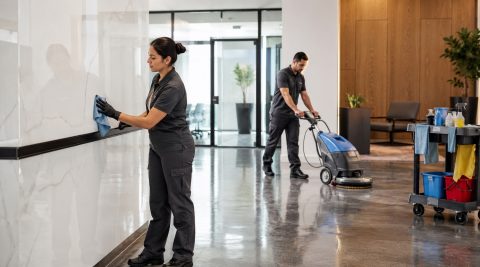
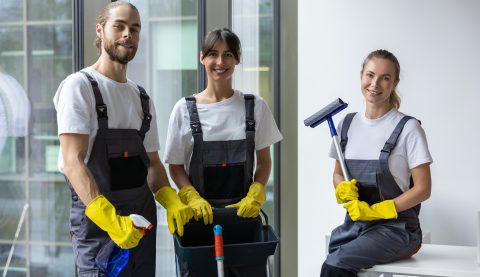
Nord Baleares, experts in post-construction cleaning in Mallorca
We have extensive experience working on homes, commercial premises, communities, and all types of spaces that require a flawless finish after a renovation. We know that this final phase is crucial for the result to look its best.
Our team takes care of the entire process , from waste removal to deep cleaning of floors, tiles, windows, and hard-to-reach areas. If you’re looking for cleaning services in Mallorca that will allow you to finish your project with complete peace of mind, Nord Baleares offers a professional, fast, and efficient solution.